Turtlebot3自动驾驶2020仿真教程-车道识别
Turtlebot3自动驾驶2020仿真教程-车道识别
说明:
- 本教程主要介绍如何在TB3自动驾驶2020的仿真中实现车道识别的校准和测试流程
由于在该仿真环境是固定不变的,所以可以先使用程序默认配置好的参数进行测试,若效果不好再重新校准
校准
- 新终端,启动gazebo节点
$ roslaunch turtlebot3_gazebo turtlebot3_autorace_2020.launch
- 新终端,启动相机的内标定
$ roslaunch turtlebot3_autorace_camera intrinsic_camera_calibration.launch
- 新终端,启动相机外标定
$ roslaunch turtlebot3_autorace_camera extrinsic_camera_calibration.launch
- 新终端,启动车道检测校准节点
$ roslaunch turtlebot3_autorace_detect detect_lane.launch mode:=calibration
- 新终端,打开可视化界面
$ rqt
- 点击rqt左上角菜单栏
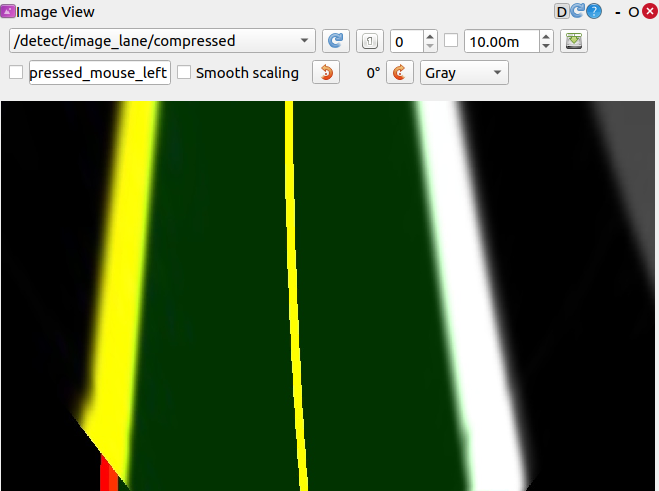
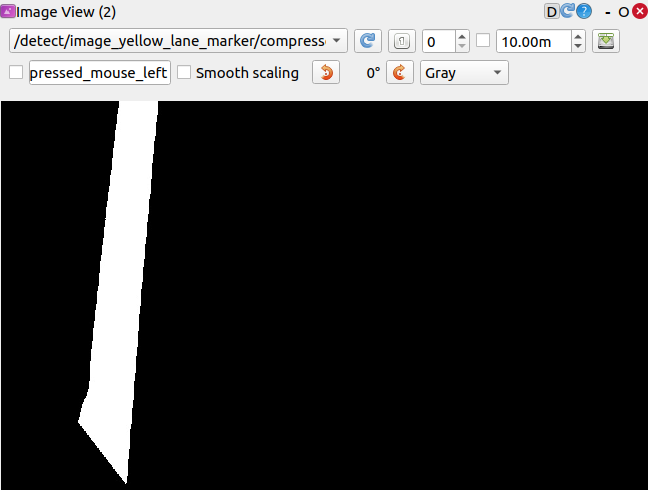
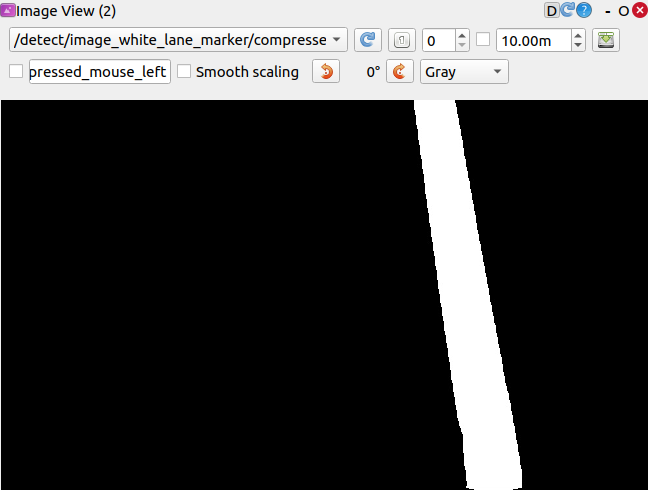
Plugins->Cisualization->Image view,依次添加三个窗口且分别订阅/detect/image_lane/compressed、/detect/image_yellow_lane_marker/compressed和/detect/image_white_lane_marker/compressed三个主题


- 新终端,打开rqt_reconfigure工具
$ rosrun rqt_reconfigure rqt_reconfigure
点击
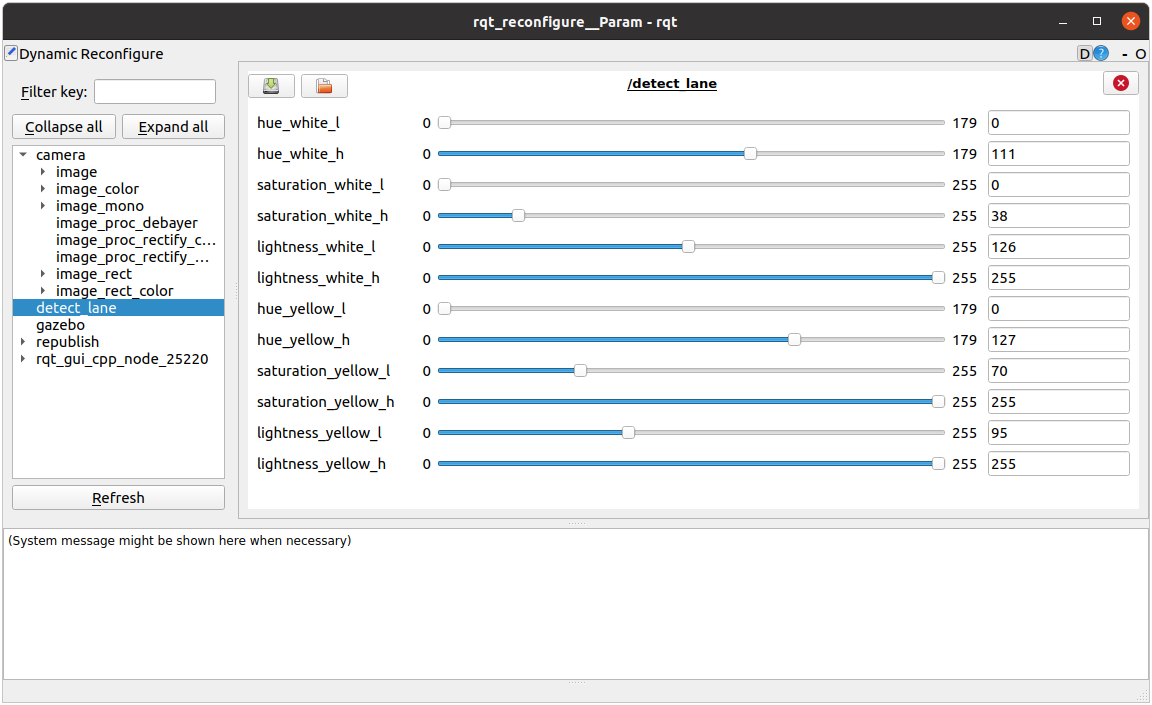
detect_lane后调整参数来过滤黄色和白色,实际需要的过滤效果可以参考上面两图首先应校准色相高低值:
hue_white_l和hue_white_h然后校准饱和度高低值:
lightness_white_l和saturation_white_h的最后是校准亮度高低值:
lightness_white_l和saturation_white_h,由于源代码包含有亮度自动调节,所以只需将亮度的高值设置为255黄色车道的过滤流程也跟上面一样

- 新终端,启动键盘控制节点
$ roslaunch turtlebot3_teleop turtlebot3_teleop_key.launch
- 当你认为当前参数已经能稳定过滤出车道时,可以使用键盘控制TB3沿着车道中心走一段距离,观察话题
/detect/image_lane/compressed的窗口里是否能正常过滤出车道
- 新终端,将调整好的值写入
turtlebot3_autorace_detect/param/lane/的lane.yaml文件中
$ rosed turtlebot3_autorace_detect lane.yaml
---
detect:
  lane:
    white:
      hue_l: 0
      hue_h: 179
      saturation_l: 0
      saturation_h: 70
      lightness_l: 105
      lightness_h: 255
    yellow:
      hue_l: 10
      hue_h: 127
      saturation_l: 70
      saturation_h: 255
      lightness_l: 95
      lightness_h: 255
测试
关闭前面打开的所有终端
新终端,启动gazebo节点
$ roslaunch turtlebot3_gazebo turtlebot3_autorace_2020.launch
- 新终端,启动相机的内标定
$ roslaunch turtlebot3_autorace_camera intrinsic_camera_calibration.launch
- 新终端,启动相机外标定校准程序
$ roslaunch turtlebot3_autorace_camera extrinsic_camera_calibration.launch
- 新终端,打开车道检测程序
$ roslaunch turtlebot3_autorace_detect detect_lane.launch
- 新终端,启动车道跟随程序
$ roslaunch turtlebot3_autorace_driving turtlebot3_autorace_control_lane.launch
演示视频
获取最新文章: 扫一扫右上角的二维码加入“创客智造”公众号


