树莓派入门教程-树莓派4安装树莓派相机驱动(ubuntu mate 20.04)
树莓派入门教程-树莓派4安装树莓派相机驱动(ubuntu mate 20.04)
说明:
- 本教程主要介绍如何在树莓派4的Ubuntu mate 20.04上安装树莓派驱动
- 默认情况下,树莓派4上安装的Ubuntu mate 20.04是没有带有rpi-clone、rpi-imager 和 raspi-config等工具,需要额外安装
- 测试环境:树莓派4b 2G + Ubuntu MATE 20.04.3 LTS + 树莓派鱼眼摄像头
操作步骤
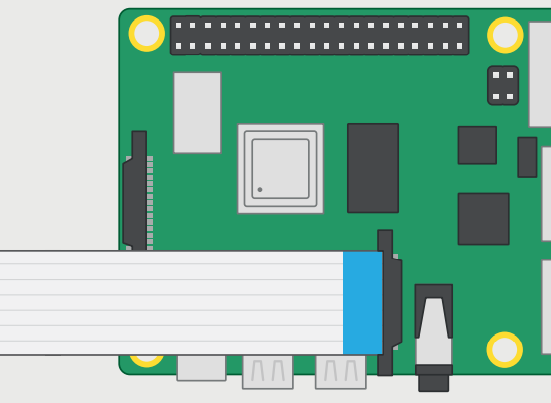
- 接上摄像头
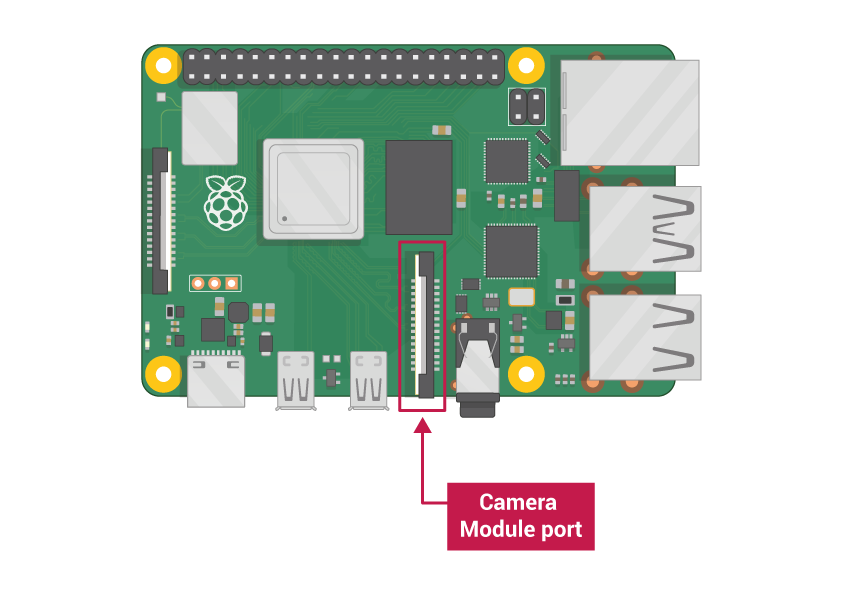
注意排线的接线方向

- 下载raspi-config的deb包,官方链接
$ wget http://mirrors.ustc.edu.cn/archive.raspberrypi.org/debian/pool/main/r/raspi-config/raspi-config_20201108_all.deb
- 安装相关依赖包
$ sudo apt install lua5.1 libatopology2 libfftw3-single3 libsamplerate0 alsa-utils
- 安装deb包
$ sudo dpkg -i raspi-config_20201108_all.deb
- 挂载
$ df -h
Filesystem      Size  Used Avail Use% Mounted on
udev            781M    0  781M  0% /dev
tmpfs          185M  4.4M  181M  3% /run
/dev/mmcblk0p2  15G  12G  2.6G  82% /
tmpfs          925M    0  925M  0% /dev/shm
tmpfs          5.0M  4.0K  5.0M  1% /run/lock
tmpfs          925M    0  925M  0% /sys/fs/cgroup
/dev/mmcblk0p1  255M  118M  138M  46% /boot/firmware
tmpfs          185M  16K  185M  1% /run/user/1000

$ mount /dev/mmcblk0p1 /boot
- 添加用户到群组
$ sudo usermod -aG video ubuntu
- 打开raspi-config配置
$ sudo raspi-config
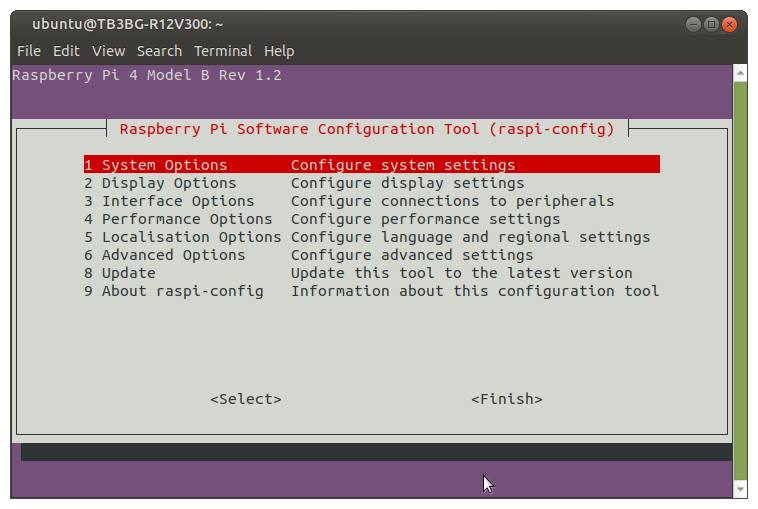
- 选择
3 Interfacing Options
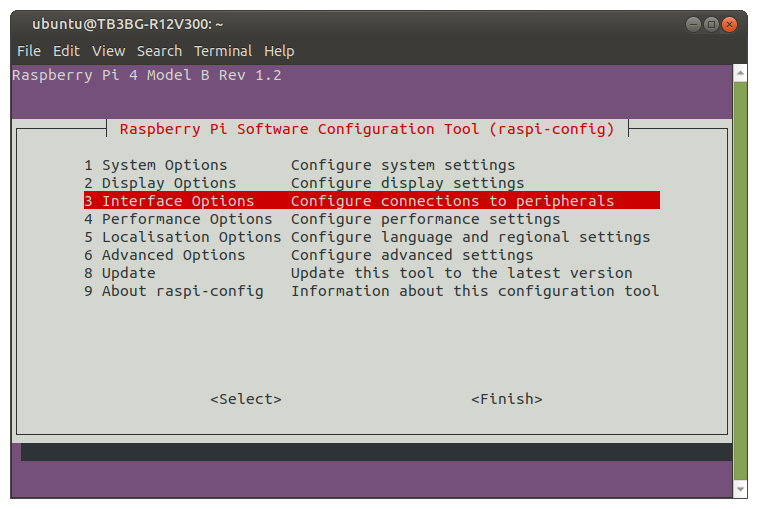
- 选择
P1 Camera
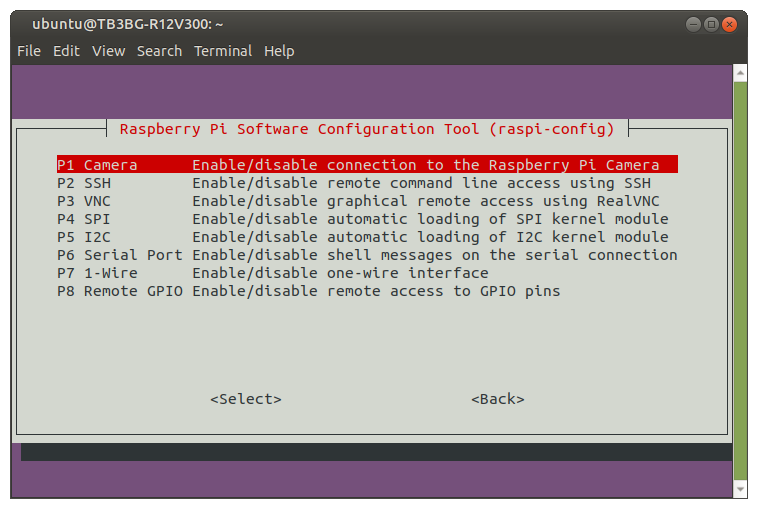
Enable camera interface
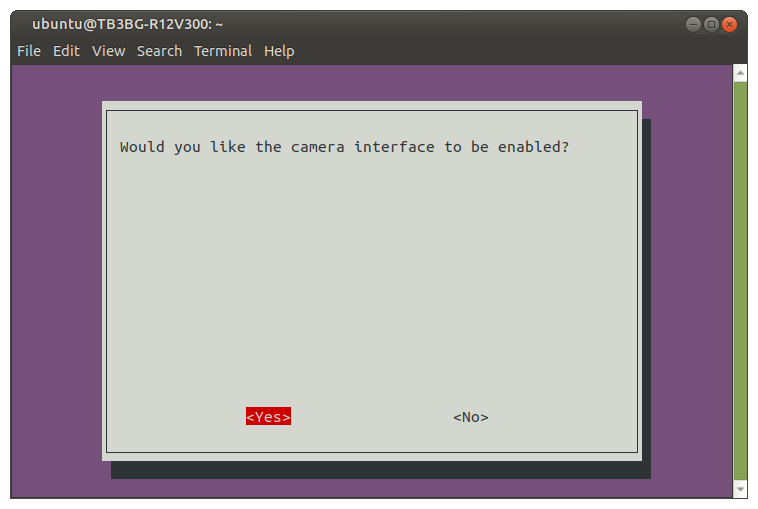
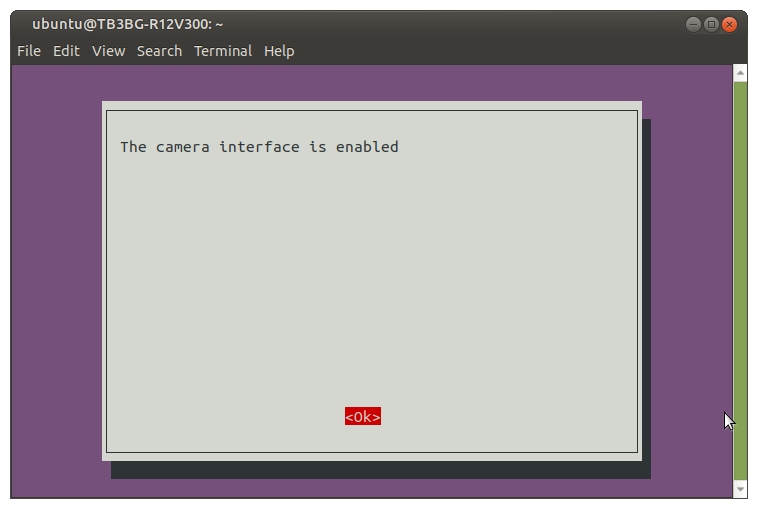
- 安装V4l2工具包
$ sudo apt-get install v4l-utils
$ v4l2-ctl --list-devices
bcm2835-codec-decode (platform:bcm2835-codec):
        /dev/video10
        /dev/video11
        /dev/video12
        /dev/media1
bcm2835-isp (platform:bcm2835-isp):
        /dev/video13
        /dev/video14
        /dev/video15
        /dev/video16
        /dev/media0
mmal service 16.1 (platform:bcm2835-v4l2):
        /dev/video0
重启树莓派
检测是否接上摄像头
$ vcgencmd get_camera
supported=1 detected=1
- 设置完之后测试以下是否能正常使用,输入以下以下命令,正常情况下树莓派系统的桌面上会生成一张摄像头捕捉到的图像
$ raspistill -v -o $HOME/Desktop/test.jpg

"raspistill" Camera App (commit )

Camera Name ov5647
Width 2592, Height 1944, filename /home/ubuntu/Desktop/test.jpg
Using camera 0, sensor mode 0

GPS output Disabled

Quality 85, Raw no
Thumbnail enabled Yes, width 64, height 48, quality 35
Time delay 5000, Timelapse 0
Link to latest frame enabled  no
Full resolution preview No
Capture method : Single capture

Preview Yes, Full screen Yes
Preview window 0,0,1024,768
Opacity 255
Sharpness 0, Contrast 0, Brightness 50
Saturation 0, ISO 0, Video Stabilisation No, Exposure compensation 0
Exposure Mode 'auto', AWB Mode 'auto', Image Effect 'none'
Flicker Avoid Mode 'off'
Metering Mode 'average', Colour Effect Enabled No with U = 128, V = 128
Rotation 0, hflip No, vflip No
ROI x 0.000000, y 0.000000, w 1.000000 h 1.000000
Camera component done
Encoder component done
Starting component connection stage
Connecting camera preview port to video render.
Connecting camera stills port to encoder input port
Opening output file /home/ubuntu/Desktop/test.jpg
Enabling encoder output port
Starting capture -1
Finished capture -1
Closing down
Close down completed, all components disconnected, disabled and destroyed
参考资料
获取最新文章: 扫一扫右上角的二维码加入“创客智造”公众号


