Arduino库教程-Bridge-Yun Serial Terminal
Yún Serial Terminal(yun串口终端)
这个例子可以让你使用YúN的32u4处理器或连接到shield的微型控制器(作为Linux处理器的串口终端)。
通过USB(不是在WiFi上)上传这个到一个Yún设备,然后打开串口监视器(波特率为115200bps)来看到Linux处理器的启动过程。你也可以用这个程序把串行监视器作为一个基本的linux命令行界面。
从串行监视器可以发出以下命令:
'~' 后跟着 '0' -> 设置 UART 速率为 57600 波特率
'~' 后跟着 '1' -> 设置 UART 速率为 115200 波特率
'~' 后跟着 '2' -> 设置 UART 速率为 250000 波特率
'~' 后跟着 '3' -> 设置 UART 速率为 500000 波特率
'~' 后跟着 '~' -> 发送bridge的关机命令控制控制台
硬件要求
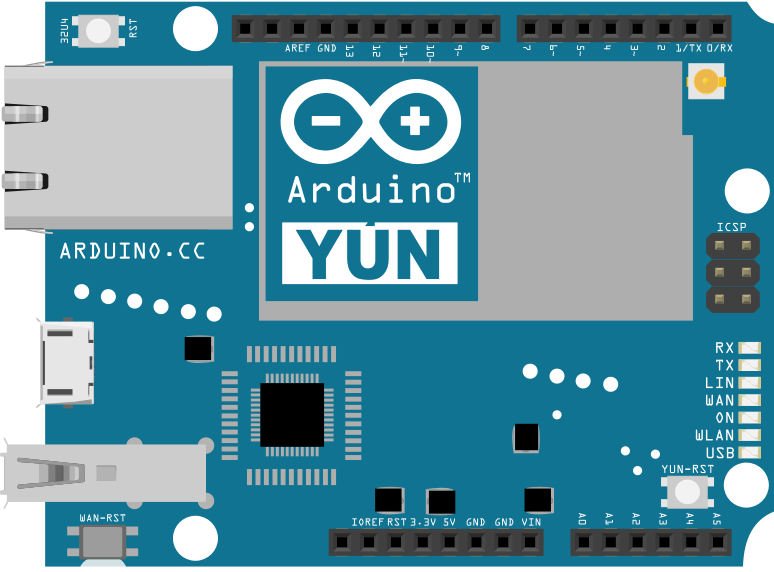
- Yún 开发板或者 shield
电路
这个例子不需要额外的连线

图由 Fritzing 软件绘制
样例代码
- 创建一个变量来保存和处理器通信的波特率,和一个用来确定是否进入命令模式的变量。
long linuxBaud = 250000;
boolean commandMode = false;
- 在 setup()里打开连接到计算机的串口和Linux
void setup() {
  Serial.begin(115200);
  Serial1.begin(linuxBaud);
}
- 在loop()里,从一个串口连接复制数据到其他串口。如果有"~"字符通过,进入命令模式。
void loop() {
  // copy from virtual serial line to uart and vice versa
  if (Serial.available()) {           // got anything from USB-Serial?
    char c = (char)Serial.read();     // read from USB-serial
    if (commandMode == false) {       // if we aren't in command mode...
      if (c == '~') {                 //    Tilde '~' key pressed?
        commandMode = true;           //       enter in command mode
      } else {
        Serial1.write(c);             //    otherwise write char to Linux
      }
    } else {                          // if we are in command mode...
      if (c == '0') {                 //     '0' key pressed?
        Serial1.begin(57600);         //        set speed to 57600
        Serial.println("Speed set to 57600");
      } else if (c == '1') {          //     '1' key pressed?
        Serial1.begin(115200);        //        set speed to 115200
        Serial.println("Speed set to 115200");
      } else if (c == '2') {          //     '2' key pressed?
        Serial1.begin(250000);        //        set speed to 250000
        Serial.println("Speed set to 250000");
      } else if (c == '3') {          //     '3' key pressed?
        Serial1.begin(500000);        //        set speed to 500000
        Serial.println("Speed set to 500000");
      } else if (c == '~') {
        Serial1.write((uint8_t *)"\xff\0\0\x05XXXXX\x0d\xaf", 11);
        Serial.println("Sending bridge's shutdown command");
      } else {                        //     any other key pressed?
        Serial1.write('~');           //        write '~' to Linux
        Serial1.write(c);             //        write char to Linux
      }
      commandMode = false;            //     in all cases exit from command mode
    }
  }
  if (Serial1.available()) {          // got anything from Linux?
    char c = (char)Serial1.read();    // read from Linux
    Serial.write(c);                  // write to USB-serial
  }
}
- 完整代码如下:
/*
  Arduino Yún USB-to-Serial

  Allows you to use the Yún101/YunShield/Yún processor as a
  serial terminal for the Linux side on the Yún.

  Upload this to a Yún101/YunShield/Yún via serial (not WiFi) then open
  the serial monitor at 115200 to see the boot process of Linux.
  You can also use the serial monitor as a basic command line
  interface for Linux using this sketch.

  From the serial monitor the following commands can be issued:

  '~' followed by '0' -> Set the UART speed to 57600 baud
  '~' followed by '1' -> Set the UART speed to 115200 baud
  '~' followed by '2' -> Set the UART speed to 250000 baud
  '~' followed by '3' -> Set the UART speed to 500000 baud
  '~' followed by '~' -> Sends the bridge's shutdown command to
                        obtain the console.

  The circuit:
   Yún101/YunShield/Yún

  created March 2013
  by Massimo Banzi
  modified by Cristian Maglie

  This example code is in the public domain.

  http://www.arduino.cc/en/Tutorial/YunSerialTerminal

*/

long linuxBaud = 250000;

void setup() {
  SERIAL_PORT_USBVIRTUAL.begin(115200);  // open serial connection via USB-Serial
  SERIAL_PORT_HARDWARE.begin(linuxBaud); // open serial connection to Linux
}

boolean commandMode = false;

void loop() {
  // copy from USB-CDC to UART
  int c = SERIAL_PORT_USBVIRTUAL.read();    // read from USB-CDC
  if (c != -1) {                            // got anything?
    if (commandMode == false) {             // if we aren't in command mode...
      if (c == '~') {                       //    Tilde '~' key pressed?
        commandMode = true;                 //       enter in command mode
      } else {
        SERIAL_PORT_HARDWARE.write(c);      //    otherwise write char to UART
      }
    } else {                                // if we are in command mode...
      if (c == '0') {                       //     '0' key pressed?
        SERIAL_PORT_HARDWARE.begin(57600);  //        set speed to 57600
        SERIAL_PORT_USBVIRTUAL.println("Speed set to 57600");
      } else if (c == '1') {                //     '1' key pressed?
        SERIAL_PORT_HARDWARE.begin(115200); //        set speed to 115200
        SERIAL_PORT_USBVIRTUAL.println("Speed set to 115200");
      } else if (c == '2') {                //     '2' key pressed?
        SERIAL_PORT_HARDWARE.begin(250000); //        set speed to 250000
        SERIAL_PORT_USBVIRTUAL.println("Speed set to 250000");
      } else if (c == '3') {                //     '3' key pressed?
        SERIAL_PORT_HARDWARE.begin(500000); //        set speed to 500000
        SERIAL_PORT_USBVIRTUAL.println("Speed set to 500000");
      } else if (c == '~') {                //     '~` key pressed?
        SERIAL_PORT_HARDWARE.write((uint8_t *)"\xff\0\0\x05XXXXX\x7f\xf9", 11); // send "bridge shutdown" command
        SERIAL_PORT_USBVIRTUAL.println("Sending bridge's shutdown command");
      } else {                              //     any other key pressed?
        SERIAL_PORT_HARDWARE.write('~');    //        write '~' to UART
        SERIAL_PORT_HARDWARE.write(c);      //        write char to UART
      }
      commandMode = false;                  //     in all cases exit from command mode
    }
  }

  // copy from UART to USB-CDC
  c = SERIAL_PORT_HARDWARE.read();          // read from UART
  if (c != -1) {                            // got anything?
    SERIAL_PORT_USBVIRTUAL.write(c);        //    write to USB-CDC
  }
}
[Get Code]
更多
- Bridge: 从网页浏览器进入开发板的引脚。
- Console ASCII Table: 示范了怎样打印多种格式到控制台。
- Console Pixel: 通过控制台控制一个LED灯。
- Console Read: 从控制台那里分析信息,然后重复发送返回。
- Datalogger: 在SD卡上保存传感器信息。
- File Write Script: 示范怎样在Process上写入和执行外壳脚本。
- HTTP Client: 建造一个简单的客户端,可以下载网页并且打印到串口监视器。
- HTTP Client Console: 建造一个简单的客户端,可以下载网页并且用控制台通过WIFI打印到串口监视器。
- Mailbox Read Messages: 用REST API通过一个网页发送文本信息到。
- Process: 示范怎么用Process运行 Linux 命令。
- Remote Due Blink: 示范怎么远程上传程序到DUE开发板上。
- Shell Commands: 用Process 来运行 shell 命令。
- SpacebrewYun: 在Arduino IDE软件的例子上看更多关于 Spacebrew 文档信息。
- Temboo: 在Arduino IDE软件的例子上看更多关于 Temboo 文档信息。
- Temperature Web Panel: 当浏览者要求时,粘贴传感数据到网页上。
- Time Check: 从网络的时间服务器获得时间,并且打印到串口监视器。
- WiFi Status: 运行一个预配置的脚本,报告返回当前wifi网络的强度。
- Yun First Config: 用串口监视器不费力地连接你的云产品到wifi网络,并且在上面回答一些简单的问题。
- Yun Serial Terminal: 通过串口监视器进入Linux终端。
获取最新文章: 扫一扫右上角的二维码加入“创客智造”公众号


