Arduino库教程-Bridge-Console Pixel
Console Pixel(控制台像素)
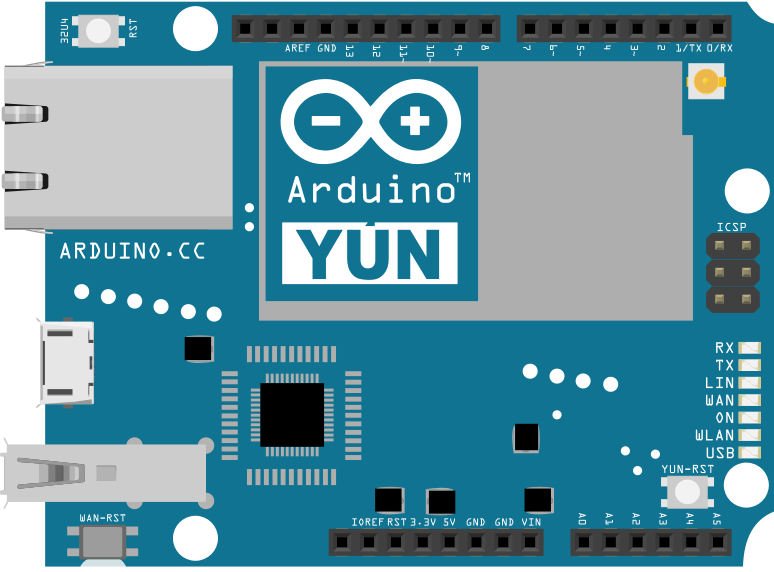
这个例子用yun设备来接受来自电脑控制台的数据。在这种情况下,当它受到字符“H”时,yun设备打开开发板的内置LED灯;如果是“L”,则关闭LED灯。
基于bridge的控制台,使你可以在yun设备和电脑之间发送信息,就像你在串口监视器做的那样,只是是无线的。它通过SSH在yun设备和电脑之间创建了一个安全连接。
为了看到控制台,确保yun设备和电脑在同一个无线网络里。在Arduino IDE的Port菜单里设置你的yun名字和IP地址,然后打开串口监视器。通过打开终端窗口和打字
ssh root@ yourYúnsName.local 'telnet localhost 6571',然后按下enter,你可以看到它。当出现密码提示,进入它。
硬件要求
- Yún 开发板 or shield
你的yun设备和电脑要在同一个网络里
电路
- 这个例子没有额外的电路

图由 Fritzing 软件绘制
样例代码
- 包括Console库(传承自Bridge)
#include <Console.h>
- 创建变量,并且命名为准备写入的引脚名,而另一个保存从控制台输入的字节。
const int ledPin = 13;
char incomingByte;
- 在setup()里初始化Bridge 和 Console 函数,然后等待控制台接口的连接。
void setup() {
  Bridge.begin();
  Console.begin();

  while(!Console);
- 一旦连接好,用Console.println()打印一些基本指令到控制台窗口,然后设置LED灯引脚为输出引脚。
Console.println("type H or L to turn pin 13 on or off");

  pinMode(ledPin, OUTPUT);
}
- 在loop()里,检查是否有来自控制台的信息。如果有,读取缓存器里最晚的字节,并响应控制台窗口。
void loop() {
  if (Console.available() > 0) {
    incomingByte = Console.read();
    Console.println(incomingByte);
- 如果输入字节是一个字符“H”,打开LED灯。如果是“L”,熄灭LED灯。
if (incomingByte == 'H') {
      digitalWrite(ledPin, HIGH);
    }
    if (incomingByte == 'L') {
      digitalWrite(ledPin, LOW);
    }
  }
}
- 完整的程序如下:
/*
  Console Pixel

 An example of using Yún101/YunShield/Yún board to receive data from the
 Console on the Yún.  In this case, the board turns on an LED when
 it receives the character 'H', and turns off the LED when it
 receives the character 'L'.

 To see the Console, pick your Yún's name and IP address in the Port menu
 then open the Port Monitor. You can also see it by opening a terminal window
 and typing
 ssh root@ yourYunsName.local 'telnet localhost 6571'
 then pressing enter. When prompted for the password, enter it.


 The circuit:
 * LED connected from digital pin 13 to ground

 created 2006
 by David A. Mellis
 modified 25 Jun 2013
 by Tom Igoe

 This example code is in the public domain.

 http://www.arduino.cc/en/Tutorial/ConsolePixel

 */

#include <Console.h>

const int ledPin = 13; // the pin that the LED is attached to
char incomingByte;      // a variable to read incoming Console data into

void setup() {
  Bridge.begin();   // Initialize Bridge
  Console.begin();  // Initialize Console

  // Wait for the Console port to connect
  while (!Console);

  Console.println("type H or L to turn pin 13 on or off");

  // initialize the LED pin as an output:
  pinMode(ledPin, OUTPUT);
}

void loop() {
  // see if there's incoming Console data:
  if (Console.available() > 0) {
    // read the oldest byte in the Console buffer:
    incomingByte = Console.read();
    Console.println(incomingByte);
    // if it's a capital H (ASCII 72), turn on the LED:
    if (incomingByte == 'H') {
      digitalWrite(ledPin, HIGH);
    }
    // if it's an L (ASCII 76) turn off the LED:
    if (incomingByte == 'L') {
      digitalWrite(ledPin, LOW);
    }
  }
}
更多
- Bridge: 从网页浏览器进入开发板的引脚。
- Console ASCII Table: 示范了怎样打印多种格式到控制台。
- Console Pixel: 通过控制台控制一个LED灯。
- Console Read: 从控制台那里分析信息,然后重复发送返回。
- Datalogger: 在SD卡上保存传感器信息。
- File Write Script: 示范怎样在Process上写入和执行外壳脚本。
- HTTP Client: 建造一个简单的客户端,可以下载网页并且打印到串口监视器。
- HTTP Client Console: 建造一个简单的客户端,可以下载网页并且用控制台通过WIFI打印到串口监视器。
- Mailbox Read Messages: 用REST API通过一个网页发送文本信息到。
- Process: 示范怎么用Process运行 Linux 命令。
- Remote Due Blink: 示范怎么远程上传程序到DUE开发板上。
- Shell Commands: 用Process 来运行 shell 命令。
- SpacebrewYun: 在Arduino IDE软件的例子上看更多关于 Spacebrew 文档信息。
- Temboo: 在Arduino IDE软件的例子上看更多关于 Temboo 文档信息。
- Temperature Web Panel: 当浏览者要求时,粘贴传感数据到网页上。
- Time Check: 从网络的时间服务器获得时间,并且打印到串口监视器。
- WiFi Status: 运行一个预配置的脚本,报告返回当前wifi网络的强度。
- Yun First Config: 用串口监视器不费力地连接你的云产品到wifi网络,并且在上面回答一些简单的问题。
- Yun Serial Terminal: 通过串口监视器进入Linux终端。
获取最新文章: 扫一扫右上角的二维码加入“创客智造”公众号


