Arduino库教程-Bridge-Console ASCII Table
Console ASCII Table
这个Yún设备例子示范了怎么通过产生字符表格和他们的ASCII值(十进制,十六进制,八进制,二进制),来打印到控制台。更多关于ASCII,参考asciitable.com。
基于bridge的控制台,可以让你从yun设备发送信息到电脑,就像你能在串口监视器做的那样,只是是无线的。通过SSH,它在yun设备和你的电脑之间创造了一个安全连接。
当你的yun设备和电脑在同一个网络里,你可以 Arduino IDE 的Tools>Ports menu蓝里发现yun设备。
硬件要求
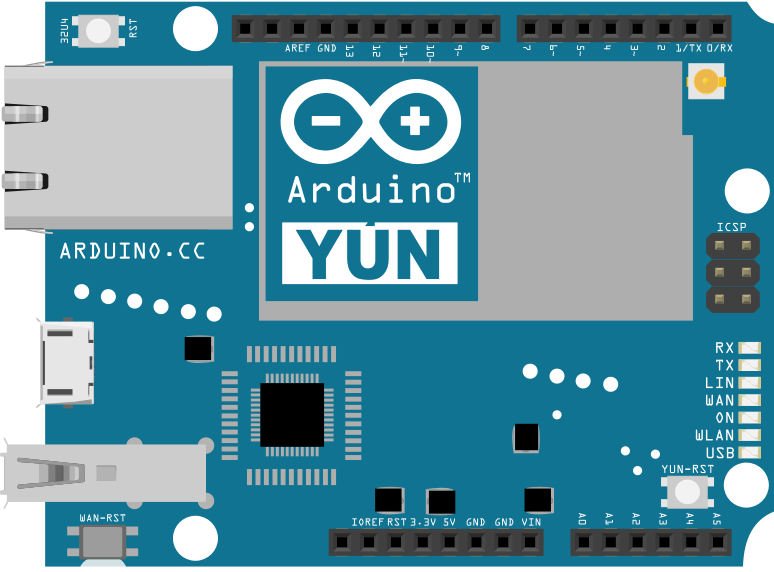
- Yún 开发板 或者 shield
你的yun设备和电脑应在同一个网络里
电路
- 这个例子没有额外的电路

图由 Fritzing 软件绘制
样例代码
- 包括Console库(传承自Bridge)
#include <Console.h>
- 创建一个变量来保存打印到控制台窗口的值。value 32的ASCII字符和上面是看不到的,所以用一个33 的值初始化这个变量(这个对应“!”)
int byte = 33;
- 在setup()里,初始化Bridge 和 Console,然后等待接口打开。一旦连接上,打印一点点信息来描述接下来做什么:
void setup() {
  Bridge.begin();
  Console.begin();

  while (!Console) {
    ; // wait for Console port to connect.
  }

  Console.println("ASCII Table ~ Character Map");
}
在loop()里,你打印各种不同格式的数值。
为了看变量的ASCII值,你可以用 Console.write()写入字节。Console解读所有数据类型,如ASCII字符。
Console.write(thisByte);
- Console.print()默认把这个数值作为ASCII编码位数的字符串打印
Console.print(thisByte);
- Console.print() 和 Console.println()也可以发送字符串到控制台窗口(代表带着合适修饰语的十六进制,八进制和二进制数值)。Console.println()增加新行和将返回的字符运输到字符串,来在控制台窗口换行。
Console.print(thisByte, HEX);
Console.print(thisByte, OCT);
Console.println(thisByte, BIN);
- 这个例子里,你只能打印出USA键盘上的字母字符,所以没必要打印超过126。为了确保所有数据在停止程序前都被发送,调用Console.flush()。
if(thisByte == 126) {
    Console.flush();

    while(true) {
      continue;
    }
  }
- 如果程序没有打印所有的值,在再一次运行完loop()之前,增量thisByte。
thisByte++;
- 完整程序如下:
/*
 Console ASCII table for Yún101/YunShield/Yún
 Prints out byte values in all possible formats:
 * as raw binary values
 * as ASCII-encoded decimal, hex, octal, and binary values

 For more on ASCII, see http://www.asciitable.com and http://en.wikipedia.org/wiki/ASCII

 The circuit:
 - Yún101/YunShield/Yún

 created 2006
 by Nicholas Zambetti
 http://www.zambetti.com
 modified 9 Apr 2012
 by Tom Igoe
 modified 22 May 2013
 by Cristian Maglie

 This example code is in the public domain.

 http://www.arduino.cc/en/Tutorial/ConsoleAsciiTable

 */

#include <Console.h>

void setup() {
  //Initialize Console and wait for port to open:
  Bridge.begin();
  Console.begin();

  // Uncomment the following line to enable buffering:
  // - better transmission speed and efficiency
  // - needs to call Console.flush() to ensure that all
  //   transmitted data is sent

  //Console.buffer(64);

  while (!Console) {
    ; // wait for Console port to connect.
  }

  // prints title with ending line break
  Console.println("ASCII Table ~ Character Map");
}

// first visible ASCIIcharacter '!' is number 33:
int thisByte = 33;
// you can also write ASCII characters in single quotes.
// for example. '!' is the same as 33, so you could also use this:
//int thisByte = '!';

void loop() {
  // prints value unaltered, i.e. the raw binary version of the
  // byte. The Console monitor interprets all bytes as
  // ASCII, so 33, the first number,  will show up as '!'
  Console.write(thisByte);

  Console.print(", dec: ");
  // prints value as string as an ASCII-encoded decimal (base 10).
  // Decimal is the  default format for Console.print() and Console.println(),
  // so no modifier is needed:
  Console.print(thisByte);
  // But you can declare the modifier for decimal if you want to.
  //this also works if you uncomment it:

  // Console.print(thisByte, DEC);

  Console.print(", hex: ");
  // prints value as string in hexadecimal (base 16):
  Console.print(thisByte, HEX);

  Console.print(", oct: ");
  // prints value as string in octal (base 8);
  Console.print(thisByte, OCT);

  Console.print(", bin: ");
  // prints value as string in binary (base 2)
  // also prints ending line break:
  Console.println(thisByte, BIN);

  // if printed last visible character '~' or 126, stop:
  if (thisByte == 126) {    // you could also use if (thisByte == '~') {
    // ensure the latest bit of data is sent
    Console.flush();

    // This loop loops forever and does nothing
    while (true) {
      continue;
    }
  }
  // go on to the next character
  thisByte++;
}
[Get Code]
更多
- Bridge: 从网页浏览器进入开发板的引脚。
- Console ASCII Table: 示范了怎样打印多种格式到控制台。
- Console Pixel: 通过控制台控制一个LED灯。
- Console Read: 从控制台那里分析信息,然后重复发送返回。
- Datalogger: 在SD卡上保存传感器信息。
- File Write Script: 示范怎样在Process上写入和执行外壳脚本。
- HTTP Client: 建造一个简单的客户端,可以下载网页并且打印到串口监视器。
- HTTP Client Console: 建造一个简单的客户端,可以下载网页并且用控制台通过WIFI打印到串口监视器。
- Mailbox Read Messages: 用REST API通过一个网页发送文本信息到。
- Process: 示范怎么用Process运行 Linux 命令。
- Remote Due Blink: 示范怎么远程上传程序到DUE开发板上。
- Shell Commands: 用Process 来运行 shell 命令。
- SpacebrewYun: 在Arduino IDE软件的例子上看更多关于 Spacebrew 文档信息。
- Temboo: 在Arduino IDE软件的例子上看更多关于 Temboo 文档信息。
- Temperature Web Panel: 当浏览者要求时,粘贴传感数据到网页上。
- Time Check: 从网络的时间服务器获得时间,并且打印到串口监视器。
- WiFi Status: 运行一个预配置的脚本,报告返回当前wifi网络的强度。
- Yun First Config: 用串口监视器不费力地连接你的云产品到wifi网络,并且在上面回答一些简单的问题。
- Yun Serial Terminal: 通过串口监视器进入Linux终端。
获取最新文章: 扫一扫右上角的二维码加入“创客智造”公众号


