树莓派3-配置-蓝牙连接
配置启用蓝牙连接
说明
安装系统后,蓝牙不一定都启动,如没启用,按如下教程启用蓝牙
步骤
- 先更新源
sudo apt-get update
sudo apt-get updgrade -y
sudo apt-get dist-upgrade -y
- 安装依赖软件包
sudo apt-get install pi-bluetooth bluez bluez-firmware blueman
- 下载好后,将pi用户添加到蓝牙组。
sudo usermod -G bluetooth -a pi
- 启动服务后,重启树莓派,应该就能看到蓝牙图标。
sudo systemctl start bluetooth
sudo reboot
- 界面操作
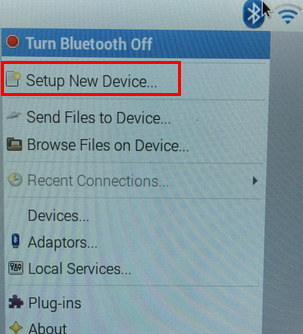
点击蓝牙图标,选择Setup New Device...

进入Introduction,选择Next。进入Device搜索界面搜索完成,选择想连接的蓝牙设备(这里指智能手机),选择Next

在Pairing中选择Use Random Passkey,选择Next

- 之后会显示类似下图的页面,同时在手机上会有提示配对信息,选择配对。

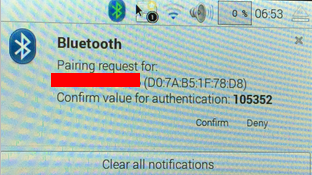
- 在手机选择配对后,树莓派上也会弹出配对信息,选择Confirn。此时即完成了配对(有些手机可能还需要在进行一次连接后,才能正常通信)

对蓝牙通信进行一些简单的测试:
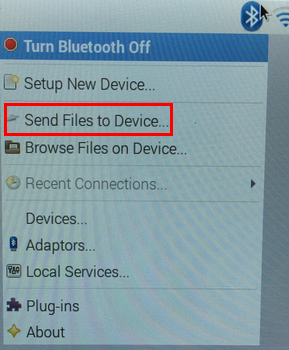
选择Send Files to Device...

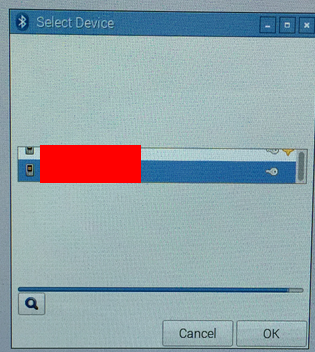
选择相应的设备,点击OK

选择要发送的文件,点击OK,即发送成功(在手机端需要选择确定接收,安卓接收文件正常,IOS估计需要用其它方法才能正常接收文件)
相关命令:
- 启动蓝牙服务
sudo systemctl start bluetooth
- 配对某个设备过程:
sudo bluetoothctl

[bluetooth]# trust xx:xx:xx:xx:xx:xx

[bluetooth]# pair xx:xx:xx:xx:xx:xx

[bluetooth]# connect xx:xx:xx:xx:xx

或者:  sudo rfcomm bind 0 xx:xx:xx:xx:xx:xx
- 查看蓝牙工作状态
systemctl status bluetooth
- 扫描附近的蓝牙设备
hcitool scan
获取最新文章: 扫一扫右上角的二维码加入“创客智造”公众号


